
From Wednesday 11th of November – Tuesday 24th of November. Click here to download PDF version
Please press control + shift + R to refresh your browser and see the latest changes.
- ‘Remember Me’ at Login
At login, you are now able to tick the ‘Remember Me’ check box and your login email address and org name will be auto filled the next time you go to log in.

2. When picking seats online, the seat will spin for a second or two while it processes that seat.

3. You can now change the method for picking seats online from Single Seat Selection to ‘Multiple Seat Selection’. You are also able to choose to adjust this setting per event/activity. This function can be found under Organisation Settings > Event/Product Settings > Seat Map. See below for example of multiple seat selection.


4. Zoom Primary Login Email Address
In Organisation Settings > General Settings under the Zoom section, we have now added that the Zoom primary login email address be entered as mandatory. All new customers will set it up with that information, existing customers will need to enter this information to ensure the correct functionality of Zoom hosting events.
The reason for this is if you have a Zoom account with multiple users, not every user has access to webinar capabilities. Therefore, the primary email address (the email address the account was made with) must be entered and used with TicketSearch to ensure webinar/online event hosting capabilities.

Note: We recommend that everyone add the ‘Zoom Webinar Confirmation Details’ tag to the confirmation email template. This ensures that when you host online events, the customers will receive all of the necessary information to access the event in their confirmation email. To do this you need to go to Tools & Templates > Email/Letter/SMS Templates > Other Email > choose to edit ‘Confirmation’.
Once you’re in the template, go to Message Text, choose the position where you would like to add the tag, and choose ‘Insert Tag’. You will find the tag with the name ‘Zoom Webinar Confirmation Details’, select it to insert. It’s important to note that the Zoom information will only populate on the confirmation email if it’s to confirm an online hosted event.

5. In the online customer account, we have corrected a mistake that displayed ‘Get Ready! you next event is in __ day(s)’. This has now been corrected to say ‘your next event’.
Get ready! you next event is in 7 day(s)
6. Tasks now allow PDF’s to be uploaded
If you select Add Task from the main page, you are now able to also upload PDF’s as a document type. Previously you were not able to upload this document type.

7. When you click cancel in the online sales flow, it now returns you to the same page as when you press ‘Continue Shopping’. You can choose which page you are redirected to in Org Settings > Step 3: Sales and delivery > Shopping Cart. You can choose to be redirected to your Organisation Listing page, your Venue Listing page or a custom page that you enter. You also have the option of changing this redirect link per event/activity.

8. Transaction Import Update
When doing a transaction import, under customer database import, you can now add the same confirmation number which is useful for multi-event shopping carts and we can also now accept revenue as 0. Previously you couldn’t have imported an event that had a revenue of 0.


9. Sticky Headings in the system
We have now added ‘sticky headings’ in various areas in the system. Sticky headings mean that the headings/top of the table stays in view at the top of the screen even when you scroll down or up. This can also be called a static header. They have been added to:
Standard Sales
Fast Sales
Events Listing
Subscriptions & Packages Listing
Scheduled Reports

10. Previously, when you sent out an email, such as the confirmation email, hyperlinks were not properly being displayed with a blue underline. This has been corrected and they are now displaying as they should.
11. Product off-sale date AND time
Now, when you go to build a merchandise item and you select to choose an expiry date, you are able to enter both a date and time. Previously you could only enter an off-sale date. This means you can set an absolute time, so if you have, say, pre-dining experiences, you could get it to go off-sale (x) number of hours prior to the show depending on the date and time you enter.

12. We have added extra ‘Jargon’ functionality to the system in the back end to account for the language that each organisation might prefer. This means you could change the word ‘Subscription’ to ‘Pass’ or ‘Event’ to ‘Activity’, for example. Jargon settings are found in Organisation Settings > Step 2: General Settings.
13. Waitlist Updates
a. Now when you got to the ‘Build & Manage Events’ listing page, and you expand the filters, you are able to tick a check box to show events with a waitlist only. If you press ‘Filter’ with that box checked, your waitlisted events will display in the table with a red bell under the ‘Actions’ column.

b. You are also now able to produce a Waitlist report from the reporting section.

c. We’ve also added new user privileges to the system in regard to Waitlist access. They are:
Under Reporting > Waitlist Report
This gives the user access to the waitlist report to pull data.
Under Events/Products > Waitlist- Under Events, view Customers listed under waitlist
This gives the user the ability to go into events and ONLY access the waitlist of customers for waitlisted events. This does not give the user any access to editing functions within events – it is simply to see the customers on the waitlist.

14. Waitlist Displaying in Sold Out and Allocation Exhausted Scenario
If you are using a waitlist and you had a sold out AND allocation exhausted scenario, the waitlist was not displaying. The waitlist is now displaying properly in this scenario online as seen below.

15. In the confirmation email, where it displays the details of the customer’s order and summarises the ticket types, we’ve added in smaller font the break-down of the ticket types to summarise each, which is particularly useful if there’s price overrides.

16. When you add upsells from Ticket Type in Step 3 of Events, it now accepts 50 characters as the subject.
17. Previously, if customers files were being merged together, and they had imported transactions associated with them – the merge would fail. This has been corrected. To merge customers, go into Customers & Transactions, conduct a search through one of more of the fields and in the next screen you will see the merge function available.

18. For the Australian region, we’ve added logic that now removes the leading zero from the mobile number when sending an SMS to ensure that Amazon Web Services can always send the SMS’s correctly.
19. Manual Payment Method Update
Manual methods of payment can now be set up in the system. These methods will then show on the finalise order screen as an option and can be processed as a sale online or in the back end. For example, this could be set up as ‘Charge My School Account’, then this method will display to customers on the finalise order screen as an option to process the sale. You can then pull this data from the transaction report to charge that customer through your internal system. This is a client request.


20. Reservations Updates
a. We changed the ‘Confirm’ button to ‘Refund Reservation’ which makes it more clear on the action of the button.
b. When you don’t have a payment against a reservation, the ‘Refund Reservation’ button won’t appear.

21. Refund and Exchange fees have been added to the Primary Reconciliation report.
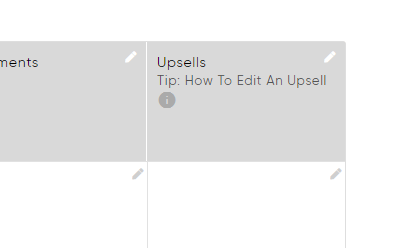
22. Match Delivery and Validity to Event tickets for Upsells
From Events, when you click to add an upsell product, the match delivery and validity to event tickets option has been marked in red and defaulted to yes as it’s an important function in relation to upsells.


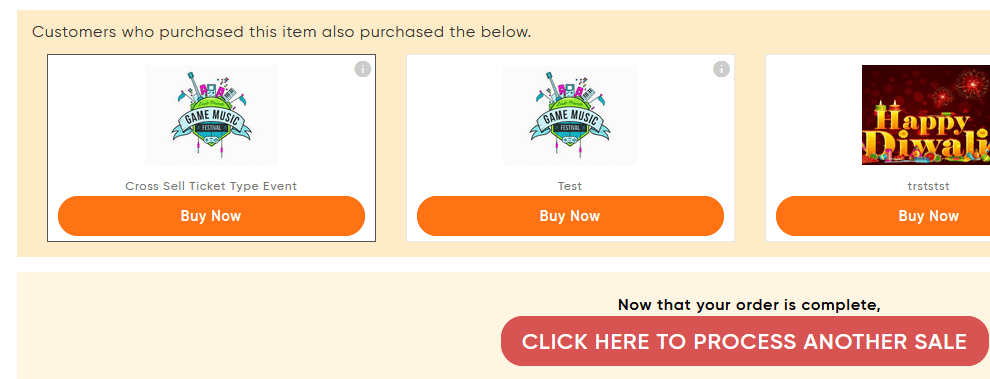
23. In backend sales, when you finalise an order – we’ve added the text ‘Now that your order is complete,’ above the ‘Click Here to Process Another Sale’ button.
24. ‘Exclude this hold type from Capacity’
We’ve now added the ability to create a hold type and exclude it from your overall selling capacity. By checking the box, any seats associated with that hold type will not be included in the capacity but will still physically appear on your seat map.
This is important for a range of scenarios, such as if you want to add seats for sound desk, have them appear on the map but don’t want them to be included in your overall capacity. This is also important for those venues which are holding rows to meet social distancing requirements.
This option will allow you to still keep the seats physically on the seat map rather than using the hold type‘*Kill/Hide’ to remove seats from capacity, which removes the seats completely from the seat map. Please always remember if you are using social distancing seat maps, that your available seats in the box office back-end application equals selling capacity less holds (unless those holds have been excluded from capacity).
It’s also important to note that excluding the hold type from capacity will affect ALL events and performances that use this hold type.
REMINDER: If you are using social distancing seat maps, please keep in mind that unless you use this function the holds WILL BE included in your overall selling capacity, so if you have a selling capacity of 100, with 20 holds (that you didn’t exclude from capacity), you will sell out when you reach 80 tickets as those holds still have the potential to be sold and are included in capacity.

25. For Stripe customers, we’ve added some details in red to make it clear to the person making the transaction as to what they have to do.


26. The Complimentary Ticket/Item and Refund Reason reports have had the customer first name, surname and also the module added in as fields.


27. The Refund Reason report has had ‘GL Account’ added as a data field.

28. Promotor Access Detail report has had upsells added as part of the experience, specifically for the event that you select.
You will see in the report filters under the ‘Marketing Filters’ tab that you are able to choose ‘Show Upsells with Event’ or ‘Show Upsells Only’. Show upsells with event will pull the event and upsell data together, and show upsells only will only generate the upsell data of the event/performance that you have selected. Only pulling upsells is useful if, for example, you had a pre-show dining experience and you wanted to send off the list of upsells to catering for a specific performance.

You can also choose what fields/options you would like to display on the report in relation to upsells. You have the choice to show the event upsell name, date and time, as well as an option to show upsells separately. Selecting ‘Show Upsells Separately’ will show individual items that were sold purely as an upsell or through the merchandise area. For example, it will separate t-shirts and t-shirt upsells.

29. Securepay Update
We’ve added informative help files in the Help section of the system for Securepay customers as well as informative links under Payment Gateway Selection in Organisation Settings > Step 4: Finance Setup.


30. We’ve updated the date format throughout TicketSearch so it suits all regions using the system. It now looks like the below:

31. Seats now display clearly on the screen along with ticket holder information when a customer is manually checked in on the TicketSearch scanning app. This can assist you in directing customers to their seat fast and effectively.

32. ‘Continue Shopping’ button in the online member’s account
We’ve added a ‘Continue Shopping’ button to the online member’s account to encourage more sales through the system. This button will redirect you to the destination you have set in Org Settings > Step 3: Sales and delivery > Shopping Cart.
You are able to adjust what this button looks like online to customers in Platform Customisation > Online Customisation > Click for more options > Member Account. You can change the text, the colour and even add a background colour to make it stand out. This button has been added as a hyperlink with an underline.

33. Link Generator – Promo Code Update
Using the Link Generator, you can select an event, enter your promo code and the system will then generate a link which will auto-populate the promo code without the customer needing to enter the promo code manually.
We’ve enhanced this further to work on all performances of an event rather than by having to select each performance, which you previously had to do.
34. Text on page
We’ve added some text under ‘Global Delivery Methods’ (Organisation Settings > Step 3: Sales & Delivery). It says “Tip: To view all table contents, please remember to scroll across.” The table for delivery methods is quite big so we just wanted to remind staff that you need to scroll across to view the entire table.

35. CK Editor Update
To all CK editors in the system, we’ve added the ability to align the text (left, centre, right, justified). By default, the text is aligned to the left.

36. Filter Search Update
Now in the system, when you type to search, for example, a particular event/performance, you will automatically see the event and all the performances associated with it. This is the same for all search functions across the system, you will see the item and sub-items. Previously if you manually typed in the text, it wouldn’t display the sub-items.

37. Zoom event name character length
On TicketSearch, we allow 250 characters max for the event name, but Zoom only allows a max of 200. When creating a Zoom online hosted event, if you go over the 200-character max – the system will give a warning message to let you know you have gone over and will not let you continue until correct it.

38. Tags Update – You can now hide tags on your listings page
You can now hide tags from the main listing page by clicking on the image of the eye under the ‘Actions’ column. This means that you can import your tags from another system and hide them from view, so they don’t clog up the listings page and they also won’t appear against the customer’s profile. However, you can bring them back to life again at any time and still report on them.
If you simply make a tag inactive, it will remove it from the customer’s profile entirely. You can easily tick ‘Show All’ to reveal all hidden tags in the list.

39. Marketing Codes Update
Marketing codes now appear throughout the system in the same order that you have created under Marketing > Marketing Codes.

40. The Primary Marketing report has been optimised for performance when pulling data from the system.
As we use Cloudflare, there is a security limitation that requires all data to be pulled within 1.5 mins. We have already started the implementation of moving over to Amazon’s security interface as our servers are already hosted by Amazon and the time out period for pulling data will increase to 3.5 minutes. By moving across, we will also be able to provide custom domain names for your organisation (e.g. tickets.abc.com) rather than having to use the TicketSearch domain. We’ve had a few requests for this and are working towards offering this service.
41. Inside charges have now been included in the Primary Reconciliation and Promotor Access Detail reports for merchandise.

42. ‘Venue’ has been added as a field to the Transaction and Primary Reconciliation reports.
43. Exchange Update
If you were exchanging tickets over a sales channel such as the internet that has a transaction limit e.g. 2, when you clicked to exchange tickets to the same event, i.e. another performance, the system was not allowing the exchange to occur as the 2 held tickets and the exchanged tickets would be greater than 2. We’ve updated our code to ignore the exchanged ticket amount if doing a full exchange.

44. Enhancement to Platform Customisation
You can now customise the below area in Platform Customisation > Online Customisation > Click for more options > Events.

45. We’ve added a ‘Click here’ function to learn about how to find your Mailchimp API key.

46. You are now able to filter by Operators in the Transaction report.

47. Shopping Cart Timer Update
You cannot have your shopping cart timer any less than 5 mins. This is to avoid any mistakes when entering a number where the shopping cart potentially might not work.

48. Gift Voucher Updates – Voucher Balance Remaining
Gift Vouchers can now act as a like a store credit. The vouchers can be automatically sent to a friend on their birthday and they can reuse the same voucher serial number over and over until the credit is used.

Above: To use this function, clients will need to go to their gift voucher template and add in the ‘Voucher Remaining Balance’ tag. You can also add the text above it to clearly indicate what the number displaying means. Customers now don’t need to be issued with a gift card over and over, however if you still want to issue them each time they use a portion of their balance, you can go into the reprint function and the system will reprint the voucher with the updated voucher balance.

Above: Both online and in the backend, customers and staff members get a clear indication of the remaining voucher balance.

Above: When you look up the order, you’ll always see the voucher remaining balance.

Above: On the confirmation email, the customer will see the voucher balance remaining.

Above: The reprint function.

Above: In the online customer account, customers can see their voucher balance remaining, voucher ID and voucher expiry date.

Remember to add the tag and text for voucher remaining balance on your e-voucher and printed template as well.
49. Text Update to Reservation Email Template
We have made a correction in the template for Reservation emails. We’ve corrected ‘You’ to ‘Your’. This will already be updated for any new clients, but existing clients will need to go into Tools & Templates > Email/Letter/SMS Templates > Reservation Emails and choose to edit ‘Reservation’ and make the change.


50. Customisation enhancement – Promo codes has extra line that was displaying removed and ticket types is no longer separated by an extra space.
51. Firefox issue resolved
When using Firefox as your browser for TicketSearch, the labels for marketing codes and categories were previously not visible. This has been resolved.

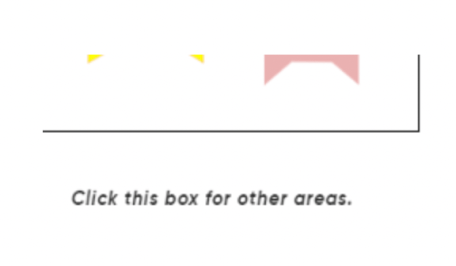
52. Area Maps Update
Area maps (e.g. Upper and Lower areas) now has a ‘Click this box for other areas’ text added so the user knows what to do to move between areas.
53. Ticket Holder Information Update
If you turn off ticket holder information and transactions are processed, you can now turn it back on and add ticket holder information to those processed orders.

54. Scan Rejection Reasons
We’ve updated the ‘how to’ documents for scanning to include information such as all the reasons why a scan might be rejected. We suggest you read these files before scanning for an event. They can be found in Sales > Scanning > and using the ‘clicking here’ hyperlinks.

55. Case sensitive customer names on the scanning app
Previously, when you looked up customers manually on the scanning app, some customers were appearing without capital letters as the first letter of their name. This has been corrected and now the name is reflected exactly how it is on the system.
56. Where previously there were some dulled coloured and transparent information boxes shown on the scanning app, we have updated the colouring to make sure the text is clear to the user.


57. We now display Company Name as a field in the Doorlist/Questionnaire report.
58. We’ve added a border around the ‘Select Package Type’ under Subscriptions & Packages to make it clearer where the selection needs to be made.

59. Text Update:

60. Date range enhancements to the Refund Reason and Complimentary Ticket/Item reports to ensure correct data pull.
61. Platform Customisation Update
‘Choose my own Seats’ and ‘Pick Seats for me’ during the online sales process are able to be customised to suit your organisation. To change the text, colour, backgrounds, go to Platform Customisation > Online Customisation > Click for more options and choose Events.

62. Tableau Reporting Dashboard is now fully mobile compatible like the rest of the system.
63.Text addition to Fees:

64. Default text update to ‘Password Reset’ email template
We’ve updated some text in the password reset email template to make it clear where exactly the temporary password is located for the user to log back into their account. Note that for all new clients, this will already be updated. For existing clients, you will need to go into the template and make the changes. They are:
a. Your temporary password is:
b. Click on the following link to use your temporary password (above) and login to your account

Above: What the template previously looked like.
To find the template, go to Tools & Templates > Email/Letter/SMS Templates > Other Emails.
65. Report Reconciliation Time Update
We’ve updated reports so that the start and end time populate correctly when adjusting by bank reconciliation time.

66. Seat Map Text Correction
We noticed that sometimes when building seat maps, random text would appear beneath it that couldn’t be deleted, this has been rectified.
67. Subscription ticket types were appearing in a pricing template against ‘Select Ticket Type’. We’ve removed them from this area as they should only appear in the subscription area.

68. When you add a Note against a customer profile in the system, you are not able to add a ‘Subject’ up to 150 characters in length.

69. When you copy a price template, you are now blocked from changing the venue layout as it doesn’t make sense to do this.

70. Delivery Methods Scheduler Update
You can now select any amount of hours to schedule when a delivery method is implemented from the event build. For example, you can choose to send out e-tickets 8 hours before an event. Previously, it wouln’t let you enter more than 23 hours.

71. Delivery Methods Scheduler Update
‘Email Confirmation Only’ as a delivery method has had the scheduler removed.

72. With area seat maps, when you click into an area, the ‘click this box for other areas’ text is displayed underneath and the ‘Exit’ button is now visible. Both of these are functional.

73. Online and Backend Alert Update
The ‘OK’ button at the bottom of the alert has been positioned better on the page.

74. Ticket type Information when you’re in the online sales process was previously sitting behind ticket types. This has been corrected to overlay the ticket types when you go to check ticket type information.

75. Reports Update
We’ve added reporting codes to the Sold Out Status, Promoter Access Basic and Promotor Access Detailed reports.
76. You can now upload seat view images up to 2mb properly in the venue build.
77. We’ve made an update to the online sales process that if no ticket types are available within a price scale, then it won’t even show, and you won’t be able to select a seat.
78. If you were doing more than 4,000 characters in a donation description, it would fail when you tried to save it. Now the system simply stops you at the 4,000-character limit.
79. If you tried to remove all tickets from a price scale but left, for example, one sales channel active such as internet, you were unable to do this. We’ve updated our code to now allow you to do this.
80. When tabbing through the finalise order screen, now the mobile/cell or country placeholder text does not overlap into the response field space. It’s fixed to where it appears now.

81. Platform Customisation – Event Description
In Settings > Platform Customisation > Online Customisation > scroll down to Grid/List Preferences on the left of the screen, you can now tick a box that says ‘Show Event Description’ and the first line of your event description will display underneath the event title on your listings page. If you are using this function, we suggest you use the first line your event description when building an event to say something that pops.

